Sunday, December 30, 2007

Individual Tart Tatin

Some will argue, mostly the French, that the Apple Pie that we love so well was invented by them. They call theirs "Tart Tatin" and is quite tasty...sort of an apple upside down pie where the apples are bathed in rich caramel. Interesting, but I was looking for one I could do individually to break in the nifty mini souffle (like a tall ramekin) I had picked up at Surfas earlier in the month.

So after some googling around and figuring out what the basic's of a Tart Tatin were I came up with this recipe:

Individual Tart Tatin
  • pastry for a 9 inch pie
  • 8 medium Granny Smith Apples
  • 1/2 c water
  • 6 T butter
  • 3/4 c brown sugar
  • 1/2 t cinnamon
  • 1/4 t fresh grated nutmeg

Preheat oven to 425F. Butter and put 6 (about 1 C capacity each) Ramekins and put aside.

Heat a large non-stick skillet, add butter, brown sugar and water. Heat over medium heat until butter melts and it begins to bubble and thicken into a light syrup. About 4-5 minutes.

Peel and core the apples, cutting into even wedges. (A handy-dandy apple corer with the cutting blades make fast work with this chore). Add to hot sugar syrup and cook 3 minutes, stirring often until all apple slices are coated and starting to soften. Sprinkle on spices, toss to mix and coat.

Roll out the dough, cut 6 circles the size of the ramekin. Poke holes in the dough to allow steam to escape.

Lay apples on their sides dividing between the ramekins. Divide syrup evenly over the apples. Place one dough round in each dish, lightly pressing the edges against the sides.

Place ramekin's on baking sheet. Bake for 20 minutes until tops are golden brown and some caramel is bubbling up around edges.

Cool 5 minutes on wire rack. Run a knive around the inside of the crust to loosen. Place dessert plate over the ramekin and invert. Serve with ice cream.

Laying the apples isn't hard just a bit time consuming as the traditional Tart Tatin in France is them closely packed. Since I wanted to stay true to the concept I followed through that way.
I did simple little fork pricks for the steam vents. The traditional Tart Tatin is done in a 9 inch or so pie plate with the pastry tucked over and under the apples along the edges. I took the easy route and did it more like a pot-pie as my fat fingers just don't have the dexterity to tuck all those little edges under. Doesn't affect the flavor or appearance so it worked for me. Knock yourself out if you want to be traditional.
Here's one, probably not the best example as the syrup kind of ran up and over the dough. This one I didn't serve right away...a reserve for breakfast but you get the idea of what the baked variety looks like.

I opted for Granny Smith apples over some of the others as it keeps it shape well and has a natural tartness that would not become overly sweet when baked in a rich caramel. Sweet is great, but keeping some apple tartness is good too.

The big surprise of the night was that Paul brought along some ice cream not knowing what I had up my sleeve. He brought the Mashti Malone Ginger Rose Water ice cream. Hmmm...I knew apple and ginger would good food paring. What I didn't expect was that it would be the best freaking ice cream I have had in ages. How it pared with the tart tatin was unbelievable. Both standing on their own in each bite yet playing together really well on the way through. Much better than the Vanilla Bean ice cream was planning would have worked. Thanks Paul!

Side Car Cocktails

In the last year I've moved towards some really retro cocktails to start out a party. Don't know why for sure as I really do enjoy a good bottle of wine. I think it came about at my last birthday we joined a friend at Musso & Frank's to celebrate and they made the first martini ever that I really liked. A LOT!

Yesterday while trying to figure out what sorta treat for a family game night to have when my cousin Paul arrived I sat down and started watching Barefoot Contessa. It may not have inspired me for a treat, but the cocktail she served got me going.
It's a Side Car Cocktail and the recipe:
Side Car
  • 1 C cognac or brandy
  • 1/2 c triple sec or Cointreau
  • 1/4 c fresh squeezed lemon juice
  • marascino cherries or lemon peel to garnish
  • For frosting the glasses: additional fresh squeezed lemon juice and sugar

If you want to frost the glasses, dip the rim of 4 martini glasses in a shallow plate of lemon juice and then in the sugar. Allow to dry for 15 minutes.

Combine the Cognac, Triple Sec, and lemon juice in a pitcher. Pour some into a cocktail shaker with ice, shake well and pour into the glasses. Garnish with a cherry or lemon peel.

In making mine I increased the lemon juice to 1/3 cup as first taste they seemed to need just a bit more of the citrus to even out the alcohol bite.

I also used both the lemon peel and cherry for the garnish on the little cocktail sword. (Those swords are a really fun 40's bit to decorate). I skewered one end of the lemon peel, added the cherry, then folded the other end of the lemon over wrapping the cherry in a "c" type bit of lemon peel.

I went through a couple of batches. It was a moderate hit in that 3 of the 4 really liked them, one was so-so on it. One other didn't like the frosted rim. I'm in the camp that I liked the frosted rim as that little bit of sugar helped cut the lemon juice.

The first batch I used Mumm VSOP cognac that I had gotten years ago (like maybe 20 years ago?). The second batch I used my favorite brandy, Korbel brand...same folks that make that traditional methode champanois bubbly in the Russian River area. The differences were minor with the brandy being sweeter than the cognac. The cognac had a bit more bite but was smoother on the back side on the way down. It is one of those things that come down to taste, I preferred the brandy as I like that little bit of sweeter on first sip.

When I google the variations Ina Garten's seemed to be the simplest in terms of assembly and flavor profiles. I got a lot of hits as well for "side car martini" which were virtually the same ingredients.

Saturday, December 29, 2007

Barley Soup

Barley Soup was one of those winter staples when I was a kid. My Mom had it growing up in the Section 30 area outside of Ely MN. She learned it from her Mom, a great cook in her own right who was born and raised on a farm in South Dakota. This like almost all comfort food has its start in the simple and humble foods put together from what was available on the Farm. In this case it is the left over ham bone from a holiday dinner, barley and a few vegies that is much greater sum than the ingredients would suggest. It is so filling and comforting when there is a chill in the air.

This soup is pretty much what my Mom's version was when I was a kid. A bit more vegies and visible chunks of vegies to suit my tastes. My Mom's version bless her soul, wasn't as rich in vegies as too many of my siblings would just not eat it if they could see a carrot, celery or horrors, a bit of onion. I ask you, what the hell kind of soup doesn't have veg of some sort in it?

Now for the recipe:

Barley Soup

  • 1 large ham bone, meat cut off as close to bone as possible, coarse chopped about 2 cups
  • 1 yellow onion, coarse chopped
  • 1 c diced celery
  • 1 c chopped carrots
  • 1 T olive oil
  • 1 c barley
  • 2 c water
  • 2 - 3 cans low sodium chicken broth
  • 1 bay leaf
  • 2 T chopped fresh parsley

In large stock pot add oil and heat to shimmering. Add the celery and onion, stir and salt to taste. Pepper to taste. Saute about 5 minutes until starting to turn clear. Add ham bits and cook another 5 minutes or so until the onions are clear and bits are starting to brown. Stir in barley and cook for another minute until all barley is coated and bits are starting to brown.

Add 2 c water, 2 cans chicken broth and bay leaf. Add ham bone. Cover and simmer 45 minutes, stirring occasionally. Remove the ham bone, cut off remaining meat bits and return to soup. (Toss the bone over the fence to treat the neighbors dog if you don't want to bin it). Adjust seasoning. Add the additional can of broth to bring the soup to right thickness. Barley unlike some other grains can vary on how much water it takes to cook al dente so it can take 1 2- cans of additional broth at the end to get the right soup like consistency. Add chopped parsley and bring back to simmer, approx 5 minutes. Serve hot with crusty bread or simple bread and butter.

There you go one of my family favorites for you to enjoy. Total comfort food, total peasant food, but good food is good food no matter the historical source. Long live leftovers!
Friday, December 28, 2007

Wiener Bun Junk

Growing up in Michigan and Missouri, winters were bitter cold, very snowy or just cold, damp a rainy. Or any combination thereof. The first sign of winter was the change in comfort food. The winter version that still is the ultimate cold weather lunch is "wiener bun junk". My Mom got this from who knows where but was a hit for all 5 of us kids growing up.

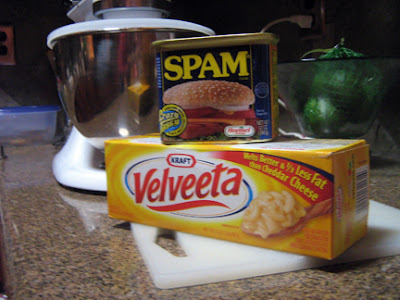
Easy enough to prep, makes a ton for a few days of lunches for the gang. Totally satisfying to have that warm hot dog bun full of melted cheese and meat. It makes you ready to head out again for the afternoon sledding or whatever one does in the winter. With Velveeta and Spam, two of the important Midwestern food groups, how bad can it be? The recipe:

Wiener Bun Junk
1 lb Velveeta brand processed cheese food
1 can Spam
1 onion - sliced in to 6 or so chunks
1/2 green pepper - sliced into 3-4 chunks
2 T mayo or miracle whip
1 T tomato paste or ketchup
Hot Dog Buns.
Aluminum foil

Preheat oven to 350F.

Slice the cheese into 6 chunks that will fit into your food grinder feed tube. Do the same with your Spam. Start feeding your ingredients starting with cheese, alternating between chunks and ending with a vegie chunk into a large bowl below the extruding end of your food grinder. Add mayo and tomato product. Gently fold ingredients until combined.

Split hot dog buns. Cut piece of foil about 12-16 inches long. Spread about 2T of the mixture onto one opened hot dog bun. Put two buns per foil sheet. Carefully fold the foil up and over the buns, gently rolling up the ends to the filled buns.

Bake for 12-15 minutes until warmed through and all melted.

There is a bit debate on what size grinder tool you use. My Mom uses the small hole die for the finer grind as done my sister Niki. My sister Val uses the food processor, but for me that is too much like a puree of mushy baloney. I prefer the large hole die as it gives a coarse grind allowing for bigger bits in each bite. Up to you, doesn't change the taste, just the texture.

It is important that you end with a chunk of vegie as that cleans up any of the cheese still in the tube. Makes our washing up later that much easier.

There it all is. I opted for ketchup as I didn't have tomato paste. Tomato paste is the preferred option, but heck I was lazy and did this trailer park substitution. Whatever works, eh!?
Don't over fill the buns. Much more than the 2T allotted you have most of it oozing out the bun all over the packet and just have a mess that takes the enjoyment of savoring each bite.
All toasty warm and ready to enjoy. Avoid the temptation to put more than 2 buns per packet. More than 2 gets you cold centers or overly crispy ends. Foil is cheap just do it 2 per packet for maximum enjoyment.

Monday, December 24, 2007

Seasalt Espresso Fudge

I swear that Stupid Easy Fudge I blogged a bit ago makes fudge making so easy...all you have to do is worry about the flavorings and you are good to go. None of that messy cooking and boiling, just quick zap in the trusty MO and you are done.

The Sea Salt Espresso is by far the biggest hit in my fudge repertoire so far. The recipe:

Sea salt Espresso Fudge

1 can Eagle Brand Sweetened Condensed Milk
8 oz bitter sweet chocolate (I used a 70% Valrhona Guana bittersweet)

8 oz semi sweet chocolate chips
2 t vanilla (the real deal not the imitation coal tar stuff)

2t instant espresso or coffee
1/2 t sea salt plus additional 1/2 t for sprinkling.

Put the vanilla and instant espresso, stir lightly and let set 10 minutes to fully dissolve.

Put chips in microwave safe mixing bowl. Pour sweetened condensed milk evenly over the chips. Microwave on high 2 minutes. Add vanilla and 1/2 t sea salt at end of heating cycle and stir until smooth.

Pour into foil lined 8X8 baking dish. Let cool on counter 1o minutes then lightly sprinkle the remaining sea salt on top and lightly press into the surface. Chill at least 2 hours in fridge before cutting into bite sized pieces. Note: you must serve within a day or so otherwise the salt will just melt into the surface of the fudge.

For this fudge do note I upped the chocolate content a bit as there was just enough extra liquid involved that it was too light and truffly in texture to hold its shape well when cut. I suppose you could substitute out all semi-sweet chocolate chips but you won't get the same sharp chocolate salt contrast.

Do not use table or kosher salt. Both are too metallic tasting, well you could if you like the taste of an old wet aluminium door screen. I have tried a few different sea salts and they do have different tastes. I have a nice Java natural sea salt that I have used in the past but it hard to get here. (Hint...Sara next time you go to Java get me another pack or two). What I used this time came from Surfas and it is the Murray Springs from Australia, light pink color and not as sweet as the Java but worked out well none the less.

There you go another variation of the Stupid Easy Fudge...btw the Bacon version was a run away hit as well at our holiday open house.

Walnut Potica

Let's start with how to pronounce this. Accent is second syllable, po - TEETS - sa. This version is the walnut potica. In our family this is the biggy that signifies 3 major holidays, Christmas, Easter and Thanksgiving. Pretty much any thinly rolled dough, yeast or strudel with a filling is called a potica. I have no idea why, it's what those slovene's do. Being 3/4 Slovene heritage I have quite a few things I do that can be traced back to my great-great or great-grandparents depending on which side of the family tree you look at it. I point this out as potica has as many variations as there are slovene great-grandmothers, each claiming to be the best. You can trust me on this, all the old Slovene ladies in Ely, MN where my grandmothers lived always debated who made the best potica in town.

Slovenia is a tiny little country in eastern Europe, first of the bits of the old Yugoslav republic that split apart with the falling apart of the USSR and communists. It is the one that move to capitalism without any civil warfare and was the first to join the EU. It's cooking styles is based on ages of occupation going to BC times by Greeks, Romans, later Austria-Hungary. The potica reflects this multicultural occupation. The bread is rich and yeasty like a Austrian sweet dough, the filling rich with honey and nuts almost like a baklava.

This variation can be traced back to my great-grandmother when she arrived in this country a bit after the turn of the last century. A few tweaks were made along the way, more specific measurements, rather than handfuls and pinches. People say my Mom makes the best potica ever and they say I am close.

Enough of the history lesson and on to the recipe:
Walnut Potica

DOUGH:
2 Cups Milk
2 Eggs
1 Cake Yeast (1 Oz)
1 tsp salt
3/4 Cup Sugar \

1/2 c (1 stick) butter - not margarine
6 Cups Flour

Method: Scald milk, add butter & allow to cool in mixing bowl.
Add sugar & yeast when bowl is only warm to the touch, mix well.
Proof 5 - 10 minutes until thick and foamy.
Beat eggs and salt, mix well & add to milk mixture.
Add half of the flour, beat well.
Add remaining flour & knead until soft and pliable.
Let rise until double in bulk.
Roll out and pull to 1/4" thickness or less
Spread on filling and roll (like in a jelly roll)
Let rest 1 Hour in well greased deep pan.
Bake 1-1/2 Hour in moderate oven

FILLING: 1 1/4 Lb. Ground walnuts
2 1/2 Cups Honey
1 tsp Vanilla
1/3 Cup Butter
4 Eggs
Mix first 4 ingredients, cook slowly to low boil, stirring constantly.
Remove from heat cool slowly 10 minutes
Mix in well the slightly beaten eggs, and cool


Now you have the recipe now for some tips. When proofing the dough I'll warm the oven to 150 or so with a pan of water on the bottom shelf. I'll warm the proofing bowl with hot water and dry it off well before oiling it. The dough is put into the warmed bowl, a clean towel over it. When the oven is to temperature I shut it off and let the dough just sit in the warm moist environment to rise.

First off this is a very sticky dough make sure your hands are very dry and dusted with a bit of flour. Spread a clean sheet over your table and flour it well. When you think you have enough, add a bit more or you will have major problems when it comes time to roll and stretch out the dough then roll it up jelly roll style.

I for the life of me cannot use just my hands to stretch and pull the dough out. My Mom can actually pull the dough so there are edges are hanging off the table and you could read a newspaper through the dough as it is that thin. I start with my hands to pull and shape it to about 1/2 the size you see in the pic. After that I switch to a rolling pin to keep from tearing big holes in the dough.
After its pulled you can spread the room temperature filling onto the dough to within a 1/2 inch or so of the edges. Do have a dough scraper handy as you will run into the odd spot that will stick to the cloth. Grab the end of your cloth on the narrow side of the dough and slowly roll it jelly roll fashion until you reach the other end. Gently fold the ends over and under to seal and prevent the filling from leaking out. Roll it carefully, adding additional flour as needed under it so can coil and lift it easily.

The giant dough snake will need to be coiled gently in thirds to make a large loaf. IT will be heavy (something like 5 pounds) and very delicate. Put a large pan (I use a 12 X 17 non-stick roaster) next to your dough. Lightly spray the pan with cooking oil or butter it. Flour you arms a bit. Reach under the dough with both arms as if pulling a newborn baby out of its first bath. Gently set the dough into the pan. Cover the dough with a towel and allow it to rise 1 hour until double in bulk in the warm moist oven.

When ready to bake pull the dough and water pan from the oven. Preheat to 350. If you have a convection oven use that feature as it really does a terrific job of evenly baking and browning. The final bit, and I don't know why you do it, but when you first pull it out of the oven rub about 2T butter over the surface of the warm potica.


There you go. It is labor intensive but worth the result. If you are short on time or energy you can always order one on line for Zup's Market in Ely and get it done faster. Their version is pretty tasty, you just won't get the fresh from the oven goodness as you do with your own.

Sunday, December 23, 2007

Peanut Butter Swirl Cookies

So here we go with the start of another category. Cookies. This time one of my favorite, actually everyone in my fam's favorite since my Mom made them for the first time a bajillion years ago when I was a kid. Peanut Butter Swirls. A holiday cookie with a decidedly unfancy appearance, but oh are they tasty. They are labor intensive so be prepared. That is likely why these cookies were made only at Christmas by my Mom....she was way too busy the rest the time chasing us 5 kids around.

The recipe:

Peanut Butter Swirl Cookies
1 -1/4 cups firmly packed light brown sugar
3/4 cup Peanut Butter
1/2 cup CRISCO all-vegetable shortening or
1/2 CRISCO Stick (I always use butter flavor Crisco)
3 tablespoons milk
1 tablespoon vanilla extract
1 egg
1-3/4 cups All-Purpose Flour
3/4 teaspoon baking soda
3/4 teaspoon salt

1 1/2 c melted chocolate chips, I use semi-sweet or 70% 

Preheat oven to 375°F.

In the bowl of an electric mixer combine brown sugar, peanut butter, CRISCO Shortening, milk and vanilla extract; beat at medium speed until well blended.Add egg. Beat just until blended.In a medium bowl combine flour, baking soda and salt; add to creamed mixture at low speed. Mix just until blended.

Line a cookie sheet with wax paper. Roll out until it is approx 10X15, just about 1/4 inch thick. Lay another piece of wax paper over the top. Refrigerate for 10 minutes to chill the dough.

Melt chocolate. Stir until smooth and let it cool a couple of minutes. Remove the top layer of wax paper Spread evenly to 1 inch of the long edges, 1/4 inch on the short edges. From the long end carefully roll the dough to the opposite side. When done carefully press the remaining edge until sealed.

Dip a serrated knife in hot water, dry and slice into 1/4-1/2" slices. Clean knife as needed between cuts. Place each cookie as cut on parchment paper lined cookie sheet.

Bake 10-12 minutes, or until set and just beginning to brown. Cool 2 minutes on baking sheet; transfer to cooling racks to cool completely.

This serves no purpose really other than show you how cool a Kitchenaide spins while mixing the dough. I know, easily entertained but what the heck, electrons are cheap in the age of digital imaging you can share anything.

Don't panic, I did in fact do a double batch of these cookies as a bunch were going out as gifts. But you get the idea on thickness and size. If you note I used a silicone rolling pin, worth the investment in those beasts as doughs really roll better with a lot less sticking than even a well oiled and floured wooden rolling pin.

I slipped the dough out of the bigger pan and put on a wooden cutting board for the chocolate spreading process. I can't stress enough you don't over chill the dough as it won't be flexible enough to roll without cracking. Having the chill not chilled enough or the chocolate too hot you get the dough all melty and it becomes a mess to work with...loses shape and chocolate runs all over while rolling. Most important is that you keep your knife warm and clean to make things easier. Once it gets caked with chocolate or dough it quits cutting and mashes and rips the dough. Gross mess at best.

My Mom uses crunchy peanut butter at times for a change. Up to you, I like it with crunchy for the cookie, the problems is I hate crunchy by itself. The whole creamy vs crunchy debate can be had elsewhere. Just wanted you to know the kind of peanut butter is up to you.

Tuesday, December 18, 2007

Salmon "Cheriyaki"

Before you get too excited there is in fact salmon prepared two ways in that pan.

The first was tonight's meal. Salmon "cheriyaki" served with simple rice and green beans. The other is simple grilled with "Montreal steak seasoning" for use another night as "salmon cakes".

Anyway the "Cheriyaki" I got the idea from who knows where. I remember somewhere along the line having an asian grilled meat with a cherry barbecue sauce that was pretty tasty. After a little tasting I came up with my own version similar to what I was looking for and just as tasty.

It is a subtle, mellow style sauce that is tasty with a strong fish like Salmon, or even Chicken and Pork.


Cheriyaki Sauce and Marinade


1 c cherry jelly, not preserves*
1 c teriyaki sauce
1 T rice vinegar
1 t Chinese 5 spice

Heat Jelly about 1 minute in microwave. Add Teriyaki sauce, vinegar and Chinese 5 Spice, stir until smooth.

*If using preserves heat and pour through strainer to remove the fruit pieces.

As a marinade brush on and let it set 5- 10 minutes before grilling or baking in the oven. If using as a sauce brush on the last 5 minutes of cooking and allow it to thicken and brown.


Tonight I used it as a marinade and grilled it off on a grill pan. I was given the Calphalon One infused nonstick grill pan a few years ago. It is one of the few non-stick surfaces that allow you to get your pan screaming hot without fear of damaging the surface. I highly recommend it as it gives perfect grill marks and caramelization and still is an easy wet cloth to clean up when done.


That was some good eats...stay tuned for the next bit with the left over salmon steaks in the next day or so.

Sunday, December 16, 2007

Chocolate Chip Muffins, its what's for breakfast


One of the family favorites. Had my own but tossed it when I found the one from Nigella Lawson. Great stuff from one helluva cooker in London. Found her on FoodTV and now have her as one of the tivo season passes. Great lady who's show is dedicated to enjoying simple food with friends and family. Right up my alley.
Chocolate Chocolate-Chip Muffins

1 3/4 cups all-purpose flour
2 teaspoons baking powder
1/2 teaspoon baking soda 2 tablespoons
best quality cocoa powder
3/4 cup superfine sugar
3/4 cup semisweet chocolate chips, plus 1/4 cup for sprinkling
1 cup milk
1/3 cup plus
2 teaspoons vegetable oil
1 egg
1 teaspoon pure vanilla extract

Special equipment: Muffin tin with paper muffin cases
Preheat the oven to 400 degrees F.
Put the flour, baking powder, baking soda, cocoa, sugar, and 3/4 cup of the chocolate chips into a large bowl. Pour all the liquid ingredients into a measuring jug. Mix the dry and wet ingredients together, remembering that a lumpy batter makes the best muffins. Spoon into the prepared muffin cases. Sprinkle the remaining 1/4 cup chocolate chips on top and then bake for 20 minutes or until the muffins are dark, risen and springy.


Add in a cup of coffee or an OJ and the day is set!

Sunday, December 9, 2007

Roast Chicken

Simple roast chicken, how hard can that be? Never did one in all they years I have been cooking. (Mostly because I am not a fan of chicken but do it to appease the fam). I have done more than a few turkey's but this was new territory. A quick search of Food TV and I found a couple that I could use as a reference point for a recipe I would call my own.

The recipe:
Simple Roast Chicken
2 approx 4 lb roasting hens
3 lemons
1 head of garlic
large carrot
2 T dried thyme
salt
pepper
4 large sprigs of fresh sage

For Herb butter:
about 3/4 stick butter at room temp.
1 t dry thyme
1 t dry basil
1 T dry parsley
1 T fresh chopped garlic
Mix and set aside while preparing the chickens

Clean out the chicken off the various body parts. Rinse inside and out with cold water. Pat dry.

Slice one lemon into 4 thin slices. Slice the other two lemons in half.

Generously salt and pepper each cavity. Add dry Thyme. Split carrot and put 1 piece in each cavity. Crush the garlic cloves, divide between each chicken. Stuff the lemon halves into each cavity. Slip fingers between breasts and the skin. Slip one slice of lemon into each slit so that each breast has a lemon slice centered in it. The resulting bulges will make the chicken look like some sort of mutant gas mask...you want it that way. Tuck one sprig of the fresh sage into each chicken.

Tuck and fold wings under the chicken. Wrap a string under the wings and then pull towards the legs. Wrap one end around a leg then draw legs together and tie to secure.

Rub chicken with the herb butter. Arrange the remaining sage leaves on top of the chicken. Salt and Pepper.

Bake at 400 until meat thermometer in thickest part of the thigh reads 165F. I use a convection roast with thermometer probe to help take the guess work out and getter a better browned and crisped skin. It should take about 1 1/2 hours to get it to that temp. Check that juices run clear before removing from oven.

All trussed up and ready to go. See...with the lemon slices under the skin it does look like a WWII gas mask!

There we go all done, thank gawd for non-stick roasters and racks. I swear if I didn't have that option I would rarely roast as with regular pans it is just a pain to get them all clean. I do two chickens at once as that way I get one for dinner tonight and another for dinner later in the week when I am way to busy to do much more than a quick reheat.

Friday, December 7, 2007

Stupid Easy Fudge


I didn't name it, a friend of mine was lamenting that making fudge is a pain in the butt and she's not good with candy thermometers. Hah! I went through all that, even the so called easy with marshmallow creme is tedious and messy.

One day I was getting ready to make fudge and found I did not have the condensed milk the usual recipe I used called for. All I had was copious amounts of Eagle Brand Sweetened Condensed. A Quick google search and I found Eagle Brand's own recipe for fudge. It is even easier when you use a microwave instead of a double boiler. That's right a microwave and one bowl does it get easier? I doubt it.

Eagle brand has the sugar and milk already cooked and thickened so you save a few steps right there. The hardest part is a toss up. Getting your pan prepped or what flavors you want to add. Since I'm more of a cooker than a candy maker the flavors are my favorite bits.

I varied from their recipe and used fewer chips to make it more smooth and creamier at room temp. Their version is a bit harder than I like to have my fudge. Besides....Nestle' does 12 oz packages right out the gate so how easy is that.
The recipe:

Stupid Easy Fudge
1 can Eagle Brand Sweetened Condensed Milk
12 oz semi sweet chocolate chips
1 t vanilla (the real deal not the imitation coal tar stuff)

Put chips in microwave safe mixing bowl. Pour sweetened condensed milk evenly over the chips. Microwave on high 2 minutes. Add vanilla and nuts if you are using at end of heating cycle and stir until smooth.

Pour into foil lined 8X8 baking dish. Chill at least 2 hours in fridge before cutting into bite sized pieces.
The other stir-ins are my favorite part. Each variation gets it's own name.

Raspberry: This is my favorite version. fold in 1/2c rough chopped dried raspberry's and 1 t raspberry extract into the smooth chocolate just before you pour into the prepared pan.


Sea Salt Espresso: Sprinkle 2t instant coffee or espresso over the chips before you pour on the Sweetened Condensed Milk. When done heating stir in 1T sea salt along with the vanilla. Chill as usual. Just before cutting and serving dust the surface of the fudge with 1t coarse sea salt and lightly pat onto the surface. Don't do this last step more than a day before serving as the salt will attract moisture, dissolve and get skanky slimy on top of the fudge.

Mint : stir in 1-2 t mint extract with the vanilla depending on how minty you want the fudge. When smooth add 1/4 c crushed starlight mints and gently fold in prior to pouring into the pan to chill.

Butterscotch: substitute butterscotch chips for the chocolate chips. I put in peanuts instead of the more typical walnuts or pecans for the nuts. The spanish kind add a nice texture and visual contrast.

Milk Chocolate: I haven't tried it but Rutz said she would, worth a try if you like lighter fudges.

Now since my pal Rutz has turned me on to Vosage Haut Chocolates I'm going to do my own version of fire...chile's, cinnamon. I also am going to do a bacon, liquid smoke version as well. If it works some will get it in gift boxes. If it doesn't well....it will make it to the landfill bin outside.
Enjoy the fudge....and if you know me you actually may get a goody bag this holiday season.

Thursday, December 6, 2007

French Chocolate Bark v2.0


I can't leave well enough alone. Tonight I made some changes to the French Chocolate Bark I made earlier. I am dying to try it. The difference?

Cherries for one. Almonds for the other. Smoked almonds to be precise for that smokey salty contrast to the smooth sweet chocolate and fruit.

I chose almonds as they already are a pairing with apricots. Something to do with them being related plants and similar flavins. Apricots and cherries are another common match for the same reason. Want your cherry pie to taste more cherry? Add a teaspoon of good almond extract and see what happens. Wow.

Anyway tonight's version of the recipe:

9 1/2 ounces very good semisweet chocolate, finely chopped
8 ounces very good bittersweet chocolate, finely chopped
1 cup whole roasted, salted smoked almonds, chopped
1 cup chopped dried apricots coarsely chopped
1/2 cup dried cherries coarsely chopped.

Melt the 2 chocolates in a heatproof bowl set over a pan of simmering water.Meanwhile, line a sheet pan with parchment paper. Using a ruler and a pencil, draw a 9 by 10-inch rectangle on the paper. Turn the paper face down on the baking sheet.

When chocolate is melted smooth fold in 1/3 of the chopped almonds.

Pour the melted chocolate mixture over the paper and spread to form a rectangle, using the outline. Sprinkle the remaining smoked almonds, apricots and cherries over the chocolate. pat lightly with hand. Cover loosely with plastic wrap while it cools.

Set aside for 2 hours until firm. Cut the bark in 1 by 3-inch pieces and serve at room temperature.

This version I used the Valrhona Guana 70% Dark Chocolate. Again, I used a silpat with a sheet the size I needed underneath rather than fuss with parchment paper. Did I mention life is good with silpat sheets?

I think I shall go to bed as the most agonizing thing for a person with an active sweet tooth is to watch chocolate set up for tasting. Tomorrow is the big unwrapping and I can't wait to taste it.

Tuscan White Bean Soup


This started out life as a soup I saw on FoodTV's Molto Mario several years ago. I think. It was one of those I picked up while napping during a show and got the idea for it. It has gone through several variations but this is the most consistent one. Since I think it was Molto Mario it has always been called Tuscan White Bean Soup, and here is the recipe:


Tuscan White Bean Soup
Olive Oil
1 white onion diced
2 carrots cut into chunks (about 1 1/2 cups)
Chopped celery, including tops (about 1 1/2 cups)
1 T chopped garlic
1/4 t red pepper flakes
1 lb cooked diced chicken
1 T dried basil (use 2T if using fresh chopped)
2 bay leaves
1/2 C fresh chopped parsley (no excuse for not having that on hand)
1 bunch kale, escarole or spinach (pic what looks best at the market)
3 15 oz cans Cannellini Beans, substitute white beans if needed.
2 quarts (32 oz) Chicken stock (canned broth is fine get low sodium if possible)


Get the biggest fricken kettle you have as this makes A LOT. Heat the pan and add enough olive oil to coat the bottom of the pan. Add onion and season with black pepper to taste. Cook about 5 minutes over medium heat, stirring often until the onions begin to become translucent. Add carrots and celery, cook another 5 minutes, stirring often. Add garlic, stir and cook 1 minute.

Add chicken, stock, beans, basil and bay leaves. Heat to boil over high then turn back to low and simmer 20 minutes. Stir occasionally. At this point taste for seasoning and add salt as needed. Add the parsley and whatever greens you are using. Simmer additional 10 minutes. Test seasoning. Serve with additional fresh cracked pepper and grated Parmesan.


The major greens really come down to what is freshest when you are in the market. Spinach is easy to find year round. My favorite is escarole that tends to be around more in the spring, kale's and chard's are found this time of year. Regardless all are good. I tried it with beet greens once, quite tasty with a sweeter finish. The problem is that it turned the soup bright red!

This is one of my go to meals when it is cold and rainy out. Serve it with hot garlic bread on the side. Sometimes a simple salad rounds it off nicely too.

I've done this as a vegetarian style soup too. I substituted out Vegetable stock (trader joe's has a really good one) for the chicken stock. I deleted the chicken and added one more can of beans and 1 bunch more of the greens. Hey...I may be a carnivore but all vegie meals hit the spot and help keep the cholesterol down and the pipes clean!

A couple of things to think about. Since a few of the ingredients are canned get low sodium where possible. If using canned stock watch your salt as some are very high in sodium and you could wind up over salting.

French Chocolate Bark

I love chocolate even though it is a migraine trigger. This week's episode of Barefoot Contessa on FoodTv was dedicated to the holidays. Her big recipe that got my attention had chocolate, dried fruit and nut done in a "bark".

I've had traditional "almond bark" made with white chocolate but it is one of those candies that coats your mouth and tongue with slime so I don't care for it much. (I suspect its the white chocolate that is really just the cocoa butter without the needed solids that makes it that way).

My very general rule of thumb with most recipes to simply follow as directed. Make notes on what worked or not. There are occasions that I look at it, see it is similar to what I have done in the past and start altering ingredients to suit my tastes. Making notes all along so I can repeat it in the future. Candy making is a newish venture for me so I tend to follow the instructions to get the techniques down pat.

The recipe:
9 1/2 ounces very good semisweet chocolate, finely chopped
8 ounces very good bittersweet chocolate, finely chopped
1 cup whole roasted, salted cashews
1 cup chopped dried apricots
1/2 cup dried cranberries

Melt the 2 chocolates in a heatproof bowl set over a pan of simmering water.

Meanwhile, line a sheet pan with parchment paper. Using a ruler and a pencil, draw a 9 by 10-inch rectangle on the paper. Turn the paper face down on the baking sheet.

Pour the melted chocolate over the paper and spread to form a rectangle, using the outline. Sprinkle the cashews, apricots and cranberries over the chocolate.

Set aside for 2 hours until firm. Cut the bark in 1 by 3-inch pieces and serve at room temperature.

So now you have the basic directions. I used the basic Nestle semi-sweet chips as I figured why fool with success. For the other I used Valrhona "61% Cocoa Extra Bitter" which I purchased at Surfas recently. This is one of those times I opted to use the double boiler method instead of the trusty microwave. Chocolate scorches too easy and I didn't want to risk the good stuff, yet.

I used whole dry roasted salted cashews as I really like the salty contrast with the bittersweet of the chocolate.

I cut things up the way Ina showed on the FoodTV program.

Instead of parchment paper I used a silpat sheet. To quote my pal Ruth666 "Life is good with silpat". No kidding nothing sticks to it and clean up is amazing. Rather than try to write on it I put a cut piece of paper under the silpat sheet in the size needed for the final bark.

I know enough about chocolate is that it gets this white powdery "bloom" if it is cooled too fast and loses its "temper". No...it didn't get mad, temper is its ability to set without bloom that you need to be aware of with working with chocolate. Another post for another time. So once assembled I put a piece of plastic wrap gently over it to avoid getting dust on it while it cooled.

It is actually some tasty stuff. A couple of things I learned in the process. Use split cashew pieces. Whole nuts split in half while you are cutting your bark into bite size pieces. Cut the apricots about the same size as the cranberry as they will stick better in the bark while cutting it.

Of course since I nailed this one it is time to experiment. Ruth666 turned me on to Vosage Haut Chocolat. They do some pretty amazing pairings with chocolate. The Red Fire (ancho & chipotle chile with cinnamon) and Bacon Bar give me ideas for this bark and fudge too.

Final note here before I close, if you haven't read Ina Garten's Barefoot Contessa collection you should. She gives great ideas on parties and history of food with shortcuts that won't affect the final product. She also gives great references to find stuff. If it weren't for her I would not have found the exact address for E. Dehillerin in Paris.

Sunday, December 2, 2007

Welcome to my Food indulgences


So here we go. Yet another spot on the web where I'll blather about. Yap a bit, share a bit of what I find in my meanders. I'll even share some of the vast amounts of trivia clogging up the various lobes to entertain. I may even toss up a recipe or two.

How did I come about the idea of doing a blog dedicated to food, more specifically the food I like to eat? Anyone who knows me that I have been taking quick pics of food and blogging with the trusty Che-ez Snap, camera phone or even my real cameras and blogging about it for years on Textamerica (it died yesterday so all those are gone), on Flickr and then more recently on Blogging.la.

Last night I was at a Christmas Party down at the Anaheim Marriott. On our plates were a variety of simple boiled baby potatoes. Every one was asking...what is that purple turd looking thing. I knew the answer "Peruvian Purple Potato". How did I know that was the most common question. "I dunno...got it by osmosis napping with Food TV on." My better half looked at me...you need to be a writer with all the stuff you know. Don't know about being a writer but I replied sure, I start a food blog as if I don't have enough to do already.

I've liked to cook since I was a little kid. My mother is a good cook. My grandmothers were good as well. All of them let me in the kitchen as a really little kid to help. As I got older "Men's Contemporary Living" in high school was my only formal education in the kitchen.

I can even remember as a kid my Mom getting for Christmas Julia Child's Mastering the Art of French Cooking and reading it. Yes, I was a strange kid but I was lucky to have parents that encouraged me to follow whatever interested me. Only a few years ago I got my own copy and cooked my way through during the course of one year. I got more ideas on technique and pairing there than likely any other source I came about.

There you go a simple question made me realize that all those hits on my various photoblogs and elsewhere I could just do a blog about food. This won't be about being the expert on food. But it will share what I cook and eat. Bon Apetit or as we said in the Ozarks..."good food, good grief let's eat".